Understanding Variations As A Climbing Instructor

When I run a Rock Climbing Instructor training course, one of the first points I try to get across to my students is “Don’t be a robot!”.

Being a good RCI is about understanding climbing and the variations of systems used.

It’s not about replicating one or two systems that you’ve been taught and using those all the time, without fully understanding the pros and cons of each system.
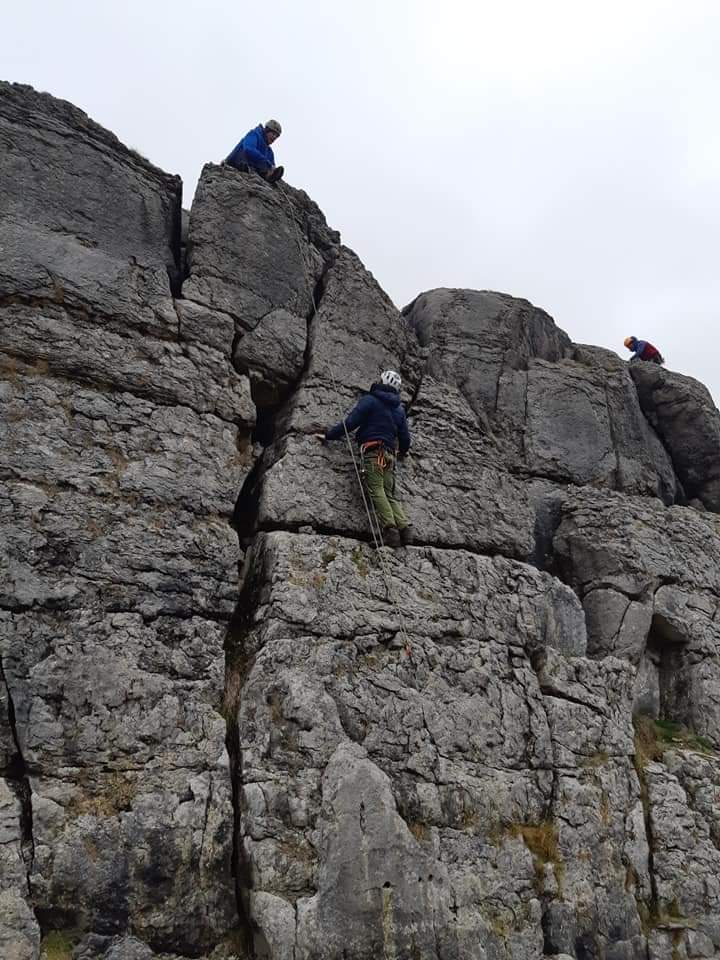
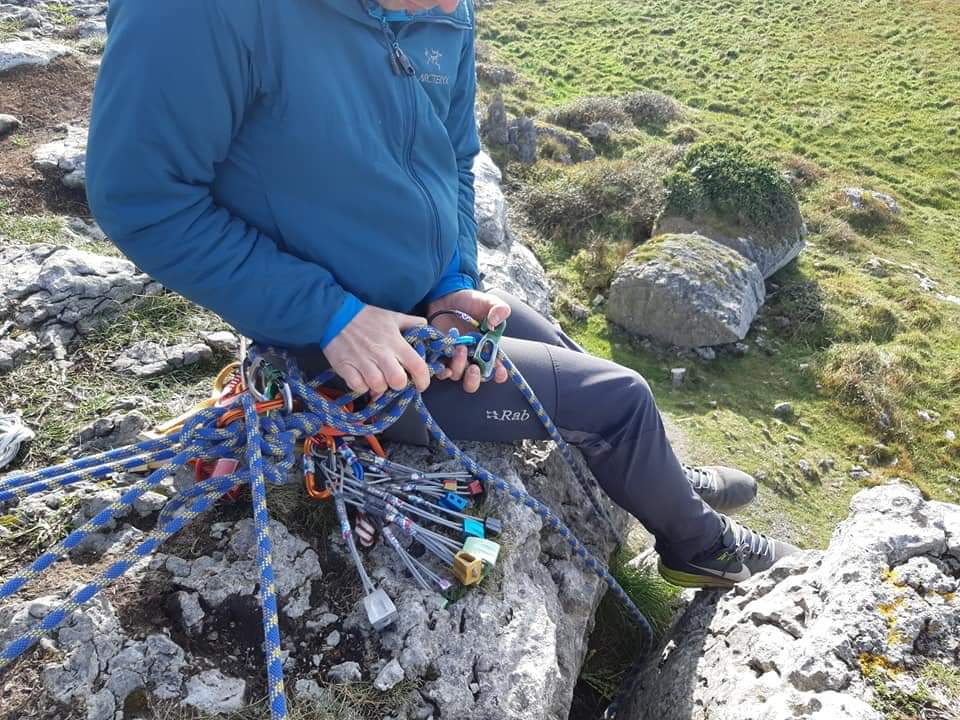
Understanding variations as a climbing instructor

Multiple variations exist for nearly all aspects of climbing. Some climbers/instructors use the same methods all the time, others mix and match as to when they use one method over another.

Knowing what the subtle differences are and how they impact on the system are key parts of being a really good Rock Climbing Instructor.

Personally, I feel the old SPA had been dumbed down considerably and to the point where a person could be capable of an assessed level of safety, but perhaps not fully understanding of the why or when we use one system over another.

Thankfully, the newer RCI syllabus goes beyond this minimum standard and requires the candidate to not just be some automaton, but a more robust scheme, where the candidate should be an active climber, with critical decision-making skills and the ability to teach and coach.

Thankfully, on the RCI training courses I’ve delivered, I’ve met candidates with a healthy appetite to learn variations and the reasons why we use them.

Bottom Rope Set-Ups

I’ve picked bottom rope setups as just one example of where variation can differ massively.

All of the pictures below of bottom rope setups are perfectly safe. Some have enhanced safety, some have subtle differences, some have massive differences. All are appropriate to use and they’re many more variations possible too.

But the important thing isn’t that I have told you these are safe to use or that one is better than another, its that you understand for yourself that they are safe to use and what the pros and cons of each system are.

Some are quick to set up, some are easily adjustable, some have less stretch and some save on the amount of gear needed.

Understanding your preference

But this blog wasn’t written to teach you 9 different ways to set up a system, it was to make you think about the way you currently do something and investigate the possibility that there’s a different way to do it.

Personal preference is important as an Instructor. We all have different preferences on how we like to do something. The job of the RCI is not only to have a preference but to understand why they prefer it.

I see new methods in climbing all the time. Whenever I do, I first try to fully understand the method and potential benefits/flaws, then I practice them, use them in a variety of scenarios and try and decide whether I like them or not, or if I can tweak it, safely, to suit me.

An RCI assessor asking you “why?” you’ve decided to set up using one system as opposed to another doesn’t mean you’ve done something wrong or unsafe.

It just means they want to see your justification for why you picked that particular method.

Assessments are pressure cooker environments at the best of time. Most of the pressure will have been created by you and not the assessor.

You might read into their questioning tone wrongly and assume you have done something unsafe when all they want is an explanation of why you made a decision.

Trust me, if it is the case you’ve done something unsafe, you’ll know about it.

I hope the above post is useful. Please feel free to contact me if you would like to discuss any aspect of this post.

Climbit Logo
AMI Logo

Self-Rescue For Climbers

Full disclosure, this isn’t so much an informative blog as an advertisement. Not just for me as an Instructor, but for my colleagues too.

Up-skilling your self-rescue techniques should be a consideration of all climbers at some point in their progression.

Self-Rescue For Climbers

In this post, I mention just a few of the problems that might arise for climbers, but no solutions. For them, I suggest you book onto a climbers self-rescue course.

If you’re interested in becoming more self-sufficient as a climber, then get in touch with me or another AMI instructor and schedule a training course.

AMI Logo

I know I love teaching these kinds of courses and I’d be stoked to run more.

Problem Solving & Self-Rescue Scenarios

The common answer from most climbers when shown a self-rescue method is that they would have “figured out” a solution or done something similar, given time.

Time is a luxury in problem-solving and rescue scenarios though. Keeping a calm head and thinking many steps ahead are important too.

Let’s look at some scenarios that can occur, some common, some less so, that climbers should be able to resolve in a timely and safe way.

Some can happen in any terrain, some are easily solved at single pitch crags and some are made extremely complex by being in multi-pitch terrain.

Climbing above a runner

If your second climbs above a piece of placed gear it puts them in a similar scenario to a lead climber, in that they have gone from being top-roped to being open to a dynamic fall.

If the second cant downclimb or reach down to fix the problem themselves then it’s up to the leader to solve the problem from above and the answer can differ slightly depending on how quickly the second needs to be safeguarded.

If they are comfy on a big ledge holding a jug then we have more time to solve the problem compared to if they were crimping on small holds and close to pumping out.

The answer is a reasonably straightforward one, but are you going to come up with it in a hurry under the pressure of time and a friend falling?

Ascending/Descending A Rope

I once abseiled into sea cliff route which looked bone dry from above to find the bottom half soaking wet and it was going to be a nightmare, if even possible, to lead.

Walking out wasn’t an option and as it was a traversing route, my friend at the top couldn’t drop me a top rope to climb it.

Using a fairly simple process with a Prusik and a Klemhesit. I ascended the 25m abseil rope to get out of there. Simple if you know how I guess.

Ascending/descending the rope can be part of a simple solution or a smaller part of a much bigger and more involved scenario.

Either way, you’ll want to make sure you can do it safely, efficiently and with a good back up knot.

Hauling

For whatever reason, your second can’t do a move, that you could do, to complete the pitch. If it were a single pitch the answer is straightforward, you could lower them to the ground and abseil down to clean the gear.

If it’s a multi-pitch though, then you may have to set up a haul system to get them past the hard crux move and on to easier terrain.

Essentially a pulley system, but If you do it in the wrong order or get the parts wrong you could cause a very big and dynamic fall for your second and possibly a shock load on your anchor.

The problem can go from a minor one to a major one very fast.  

Even if you do set up everything right, did you know that hauls/pulleys create increased forces on the belay anchor?

Do we need to beef up the anchor then? A good AMI instructor will know. They’ll also know all the other angles you may not have considered yet.

And what differs between using a belay plate in the conventional way or when its in guide mode? Or the difference between an assisted haul and an unassisted haul?

Escaping the system

You’ve just led one of the lower pitches on a remote multi-pitch. You’re comfortably belaying your partner up enjoying the stoke of an amazing route so far.

Next thing you know the rope dislodges a small flake and as it drops and it hits your second on the arm. They’re fine, but they’re pretty sure the flake has broken their arm.

They certainly won’t be climbing the rest of the pitches to the top and retreat downwards seems like the best option, but it’ll be up to you to get ye both out of there safely.

The solution isn’t going to be a quick one, but after you’ve tied off the belay plate and taken a second to think through the process, you come up with a plan. Part one of that plan is for you to escape the system you’re tied into while remaining in your harness.

Would you know how to build a system of weight transfers and redirects to allow you untie from the rope and start the next part of the rescue while keeping yourself safe?

As for the next part of the rescue, well that’s where it gets complex and best saved for a training course.

The really complex one!

So far a lot of the problems have been from the point of the view of the leader. But what about when it goes wrong for the leader and it’s up to the seconding climber to self-rescue?

Imagine a scenario where our leader has climbed up and traversed away from you on a multi-pitch route, to make it even more complex, lets say you are belaying them from a hanging belay. They fall, knock their head and are unconscious, hanging from the rope off their last piece of gear.

As in nearly all serious scenarios, I expect you will immediately call the emergency services, but they could be a while in getting to you. You have the potential to assist your partner, but every minute will count.

One wrong move and it could make the whole situation worse. For example, you can’t even begin to move in an upwards direction as your hanging belay will start to lift up too. A simple fix, but have you ever been shown how to negate an upward pull on the belay anchor?

This is a really big scale scenario, hopefully, the kind of thing that you will never have to experience and completely outside the realms of teaching someone on a one day course. But the bones of executing this rescue lies in the mastery of the simpler methods listed above.

On the last professional assessment I did, I was asked to perform the above rescue. I knew exactly what I had to do, performed it near to perfection and it still took me 40 minutes in total. I never stopped for a second of that, sweating profusely, while trying to exude a calm demeanour.

Not the kind of solution you figure out and execute safely if you’ve not been trained and practised for it.

Problem avoidance

It’s worth stating that the best way to solve a problem is to avoid it in the first place and experienced climbers do for the most part stay alert to hazards and pitfalls.

But problems do occur and small issues can become big issues quite quickly if we don’t know what we’re doing.

Being an experienced climber doesn’t automatically make you an experienced problem solver.

I hope the above post gives some food for thought, until next time.


Are you interested in taking a Self-Rescue For Climbers course? Click here to read more about the courses I run.

Climbit Logo
AMI Logo


Mountain Leader Training Course

Mountain Leader course

Who is the Mountain Leader Course for?

The Mountain Leader (ML) Award is for those who wish to lead others in the mountains and hills of Ireland and the UK.

It is designed to promote the safe enjoyment of the mountains and provides instruction in the skills required for those who wish to lead groups.

Rock climbing and leading groups in winter (Snow/Ice) conditions are not covered by the ML.

Night Navigation

To register you must:


Wicklow Mountain leader

Duration:

The course runs over 5 days but can be split into two chunks and completed over a number of weeks.

  • ML1: 3 days, including at least one evening of night navigation
  • ML2: 2 days, including an overnight wild camp

Cost:

The course costs €400 per person.

(ML1 €200) (ML2 €180)

Please feel free to contact me if you would like to discuss any aspect of this post or other skills or awards.

Climbit Logo
AMI Logo