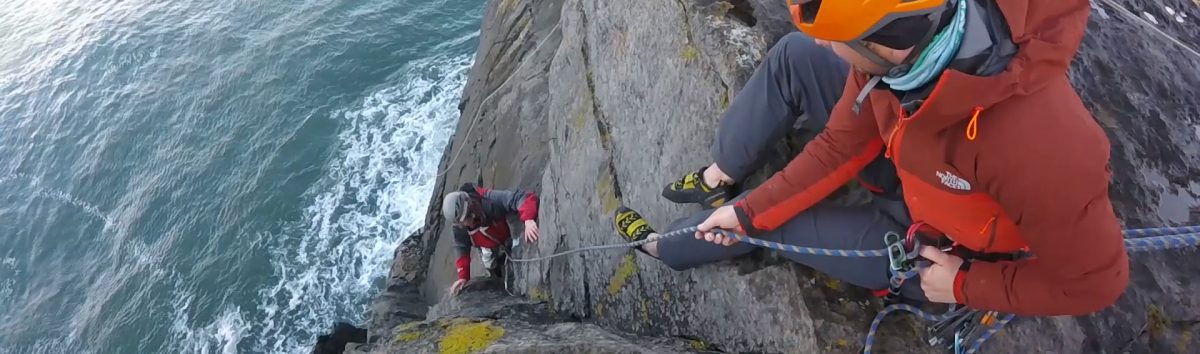
When I run a Rock Climbing Instructor training course, one of the first points I try to get across to my students is “Don’t be a robot!”.
Being a good RCI is about understanding climbing and the variations of systems used.
It’s not about replicating one or two systems that you’ve been taught and using those all the time, without fully understanding the pros and cons of each system.
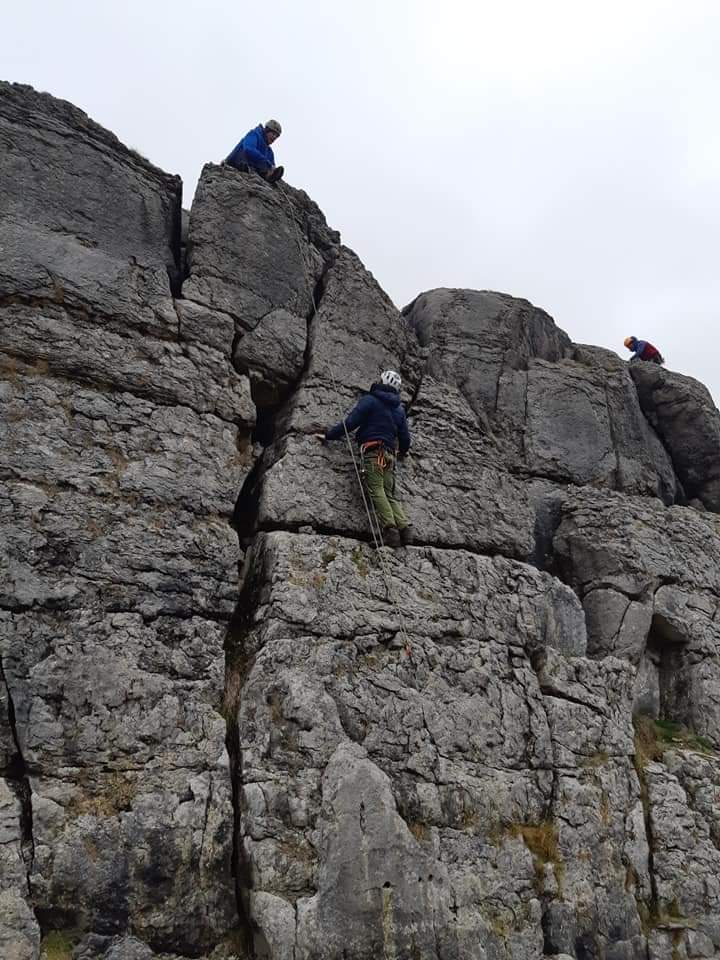
Bottom Rope Set-Up, The Burren
Understanding variations as a climbing instructor
Multiple variations exist for nearly all aspects of climbing. Some climbers/instructors use the same methods all the time, others mix and match as to when they use one method over another.
Knowing what the subtle differences are and how they impact on the system are key parts of being a really good Rock Climbing Instructor.
Personally, I feel the old SPA had been dumbed down considerably and to the point where a person could be capable of an assessed level of safety, but perhaps not fully understanding of the why or when we use one system over another.
Thankfully, the newer RCI syllabus goes beyond this minimum standard and requires the candidate to not just be some automaton, but a more robust scheme, where the candidate should be an active climber, with critical decision-making skills and the ability to teach and coach.
Thankfully, on the RCI training courses I’ve delivered, I’ve met candidates with a healthy appetite to learn variations and the reasons why we use them.
Bottom Rope Set-Ups
I’ve picked bottom rope setups as just one example of where variation can differ massively.
All of the pictures below of bottom rope setups are perfectly safe. Some have enhanced safety, some have subtle differences, some have massive differences. All are appropriate to use and they’re many more variations possible too.
But the important thing isn’t that I have told you these are safe to use or that one is better than another, its that you understand for yourself that they are safe to use and what the pros and cons of each system are.
Some are quick to set up, some are easily adjustable, some have less stretch and some save on the amount of gear needed.
Understanding your preference
But this blog wasn’t written to teach you 9 different ways to set up a system, it was to make you think about the way you currently do something and investigate the possibility that there’s a different way to do it.
Personal preference is important as an Instructor. We all have different preferences on how we like to do something. The job of the RCI is not only to have a preference but to understand why they prefer it.
I see new methods in climbing all the time. Whenever I do, I first try to fully understand the method and potential benefits/flaws, then I practice them, use them in a variety of scenarios and try and decide whether I like them or not, or if I can tweak it, safely, to suit me.
An RCI assessor asking you “why?” you’ve decided to set up using one system as opposed to another doesn’t mean you’ve done something wrong or unsafe.
It just means they want to see your justification for why you picked that particular method.
Assessments are pressure cooker environments at the best of time. Most of the pressure will have been created by you and not the assessor.
You might read into their questioning tone wrongly and assume you have done something unsafe when all they want is an explanation of why you made a decision.
Trust me, if it is the case you’ve done something unsafe, you’ll know about it.
I hope the above post is useful. Please feel free to contact me if you would like to discuss any aspect of this post.
Full disclosure, this isn’t so much an informative blog as an advertisement. Not just for me as an Instructor, but for my colleagues too.
Up-skilling your self-rescue techniques should be a consideration of all climbers at some point in their progression.
Self-Rescue For Climbers
In this post, I mention just a few of the problems that might arise for climbers, but no solutions. For them, I suggest you book onto a climbers self-rescue course.
If you’re interested in becoming more self-sufficient as a climber, then get in touch with me or another AMI instructor and schedule a training course.
I know I love teaching these kinds of courses and I’d be stoked to run more.
Problem Solving & Self-Rescue Scenarios
The common answer from most climbers when shown a self-rescue method is that they would have “figured out” a solution or done something similar, given time.
Time is a luxury in problem-solving and rescue scenarios though. Keeping a calm head and thinking many steps ahead are important too.
Let’s look at some scenarios that can occur, some common, some less so, that climbers should be able to resolve in a timely and safe way.
Some can happen in any terrain, some are easily solved at single pitch crags and some are made extremely complex by being in multi-pitch terrain.
Climbing above a runner
If your second climbs above a piece of placed gear it puts them in a similar scenario to a lead climber, in that they have gone from being top-roped to being open to a dynamic fall.
If the second cant downclimb or reach down to fix the problem themselves then it’s up to the leader to solve the problem from above and the answer can differ slightly depending on how quickly the second needs to be safeguarded.
If they are comfy on a big ledge holding a jug then we have more time to solve the problem compared to if they were crimping on small holds and close to pumping out.
The answer is a reasonably straightforward one, but are you going to come up with it in a hurry under the pressure of time and a friend falling?
Ascending/Descending A Rope
I once abseiled into sea cliff route which looked bone dry from above to find the bottom half soaking wet and it was going to be a nightmare, if even possible, to lead.
Walking out wasn’t an option and as it was a traversing route, my friend at the top couldn’t drop me a top rope to climb it.
Using a fairly simple process with a Prusik and a Klemhesit. I ascended the 25m abseil rope to get out of there. Simple if you know how I guess.
Ascending/descending the rope can be part of a simple solution or a smaller part of a much bigger and more involved scenario.
Either way, you’ll want to make sure you can do it safely, efficiently and with a good back up knot.
Hauling
For whatever reason, your second can’t do a move, that you could do, to complete the pitch. If it were a single pitch the answer is straightforward, you could lower them to the ground and abseil down to clean the gear.
If it’s a multi-pitch though, then you may have to set up a haul system to get them past the hard crux move and on to easier terrain.
Essentially a pulley system, but If you do it in the wrong order or get the parts wrong you could cause a very big and dynamic fall for your second and possibly a shock load on your anchor.
The problem can go from a minor one to a major one very fast.
Even if you do set up everything right, did you know that hauls/pulleys create increased forces on the belay anchor?
Do we need to beef up the anchor then? A good AMI instructor will know. They’ll also know all the other angles you may not have considered yet.
And what differs between using a belay plate in the conventional way or when its in guide mode? Or the difference between an assisted haul and an unassisted haul?
Escaping the system
You’ve just led one of the lower pitches on a remote multi-pitch. You’re comfortably belaying your partner up enjoying the stoke of an amazing route so far.
Next thing you know the rope dislodges a small flake and as it drops and it hits your second on the arm. They’re fine, but they’re pretty sure the flake has broken their arm.
They certainly won’t be climbing the rest of the pitches to the top and retreat downwards seems like the best option, but it’ll be up to you to get ye both out of there safely.
The solution isn’t going to be a quick one, but after you’ve tied off the belay plate and taken a second to think through the process, you come up with a plan. Part one of that plan is for you to escape the system you’re tied into while remaining in your harness.
Would you know how to build a system of weight transfers and redirects to allow you untie from the rope and start the next part of the rescue while keeping yourself safe?
As for the next part of the rescue, well that’s where it gets complex and best saved for a training course.
tying off the belay plate
The really complex one!
So far a lot of the problems have been from the point of the view of the leader. But what about when it goes wrong for the leader and it’s up to the seconding climber to self-rescue?
Imagine a scenario where our leader has climbed up and traversed away from you on a multi-pitch route, to make it even more complex, lets say you are belaying them from a hanging belay. They fall, knock their head and are unconscious, hanging from the rope off their last piece of gear.
As in nearly all serious scenarios, I expect you will immediately call the emergency services, but they could be a while in getting to you. You have the potential to assist your partner, but every minute will count.
One wrong move and it could make the whole situation worse. For example, you can’t even begin to move in an upwards direction as your hanging belay will start to lift up too. A simple fix, but have you ever been shown how to negate an upward pull on the belay anchor?
This is a really big scale scenario, hopefully, the kind of thing that you will never have to experience and completely outside the realms of teaching someone on a one day course. But the bones of executing this rescue lies in the mastery of the simpler methods listed above.
On the last professional assessment I did, I was asked to perform the above rescue. I knew exactly what I had to do, performed it near to perfection and it still took me 40 minutes in total. I never stopped for a second of that, sweating profusely, while trying to exude a calm demeanour.
Not the kind of solution you figure out and execute safely if you’ve not been trained and practised for it.
Problem avoidance
It’s worth stating that the best way to solve a problem is to avoid it in the first place and experienced climbers do for the most part stay alert to hazards and pitfalls.
But problems do occur and small issues can become big issues quite quickly if we don’t know what we’re doing.
Being an experienced climber doesn’t automatically make you an experienced problem solver.
I hope the above post gives some food for thought, until next time.
Are you interested in taking a Self-Rescue For Climbers course? Click here to read more about the courses I run.
A false loop is created when a sloppy stopper knot is tied to back up another not, most commonly in the case of climbers tieing into the rope.
What’s wrong with a false loop?
Often they are just small loops, which lessens the potential of what can go wrong, but as seen on a recent post online, some people do climb with excessively large false loops, which can lead to a whole new array of problems.
Pic courtesy of @justbombergear
Let’s look at when and why a false loop isn’t desirable in climbing:
They’re unsafe
If a climber clips into the false loop instead of the rope loop for safety, let’s say on a multi-pitch belay stance, it could be catastrophic. There have been recorded instances of this occurring and leading to accidents.
Bottom roping
If running a group session in a climbing wall with novices, it would be easy for a novice to remove the carabiner from the proper loop and clip it to the false loop and again there are recorded incidents of this happening each year.
Leading
If the loop was excessively large, a lead climber could accidentally clip into a quickdraw via the false loop and not the live rope.
If this was on trad gear they could possibly lift out the trad gear and if it was on bolts they could be yanked backwards, causing a fall onto a false loop.
It just looks plain wrong
If someone can be that sloppy with the simplest knot, then how sloppy are they with the rest of the aspects of their climbing, like building anchors.
Entrapment
Much like if you tie in with too big a loop, the large false loop can snag on protruding holds or create a suspension hazard, like in a climbing wall where there are large upturned holds.
It’s even possible for body parts to become ensnared or trapped in a loop. In the picture above it would be quite easy for the climber to catch a leg or arm in the false loop, creating an unorthodox fall.
The potential for a choking hazard on a stupidly big loop is there too, were you to get your head stuck in the loop.
Please feel free to contact me if you would like to discuss any aspect of this post or other skills and remember always buddy check and “dress & stress” knots thoroughly!
I try to use double ropes/ half ropes as much as possible when I’m climbing trad routes unless I’m climbing at a very small crag like Ballyryan.
If you’re not used to using them, they might seem like an extra faff and for new climbers, there’s a cost factor, but once you start using them you’ll never go back.
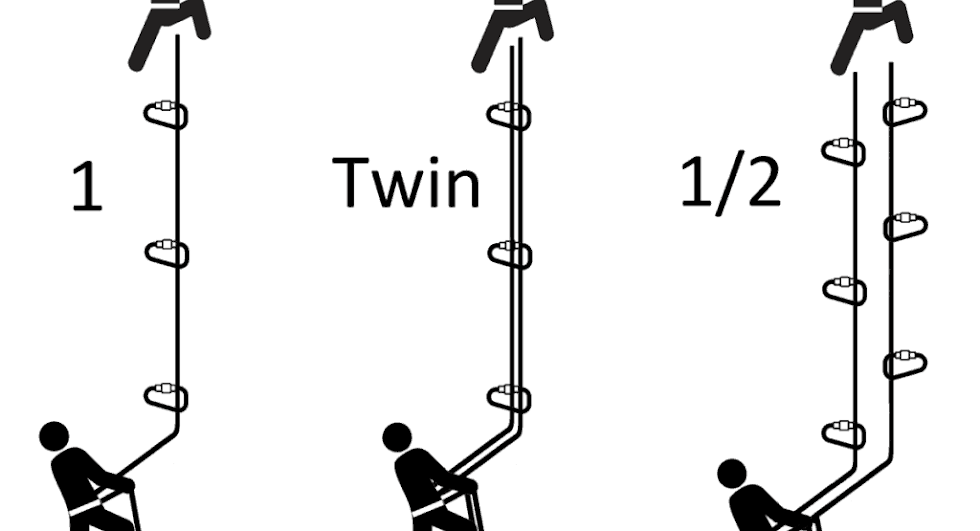
Half/Double ropes shouldn’t be confused with twin ropes.
What is a double rope?
As per the diagram below, twin ropes both get clipped to each piece of gear, while half/double ropes get clipped to alternate pieces.
So what are the benefits of using double ropes?
Your ropes run in straighter lines.
Use one rope to clip pieces placed on the right and the other to clip pieces placed on the left.
This makes falling way safer than if you were just using a single rope.
In the event of a fall, it allows the pieces on each side to be pulled in a downward direction. If you had been using a single rope, the forces of pull on the gear could have been sideways and not downwards.
Makes long abseils easier
If you have to bail off a long multi-pitch route or you purposely intend to abseil from the top of a tall crag, then a lot of faff and hassle can be solved by climbing on double ropes. For example, using 60m doubles its possible to abseil down the main face of Glendalough, saving loads of time.
It reduces rope drag
On wandering climbs like Doolin Rouge or The Ghost, where the few bits of gear available are on opposite sides of the climb, it would create massive rope drag to just use one rope.
While sometimes unsafe (point 1 above) and generally just annoying, if you were to use a single rope on a meandering climb a point would arrive where progression would probably be hindered.
Not only will progress be hindered but a zig-zagging rope will be more likely to “walk” your cams and lift placed nuts from their original placement, which could lead to the piece failing in the event of a fall.
It can make building anchors simpler
If you’ve done a long pitch and are running short on rope, it gives you twice as much rope to play with and can be the difference in making a straightforward quick anchor.
Reduces potential deck outs
The potential for deck outs or larger falls can be avoided by alternating the ropes you clip in on, a good reason to use doubles on straight vertical cracks.
When using a single rope, the moment you pull slack up to clip into gear can be the most dangerous.
Safeguarding the second climber
If the person seconding you is nervous or not psyched on seconding traverse sections, then you can place additional high runners, not so much to protect you on lead but to protect their potential to swing while following you.
Doing this with a single rope uses up a lot of extendable quickdraws or creates a ton of rope-drag
Dissipation of force under load. If you fall, using two ropes can spread the force of the fall between the gear on either side, but this can also be down to having an attentive belayer.
Teams of 3 can move faster
If you’re climbing as a team of three, then the leader can bring both following climbers up at the same time in parallel (albeit slightly staggered).
Disadvantages of Double rope
Belaying
It can initially be a bit of a faff to get used to, but you’ll soon learn a system that works for you and be cruising with it.
Cost, weight, storage
Everything is twice what is with a single rope, but I think the advantages trump these inconveniences.
Clipping both ropes
If you clip both ropes to the one quickdraw, you could possibly damage or burn the ropes as they abrade against each other during a fall. So make sure you don’t clip two ropes into the same QD or learn more about using triple rated ropes.
I hope the above post is useful. Please feel free to contact me if you would like to discuss any aspect of this post.
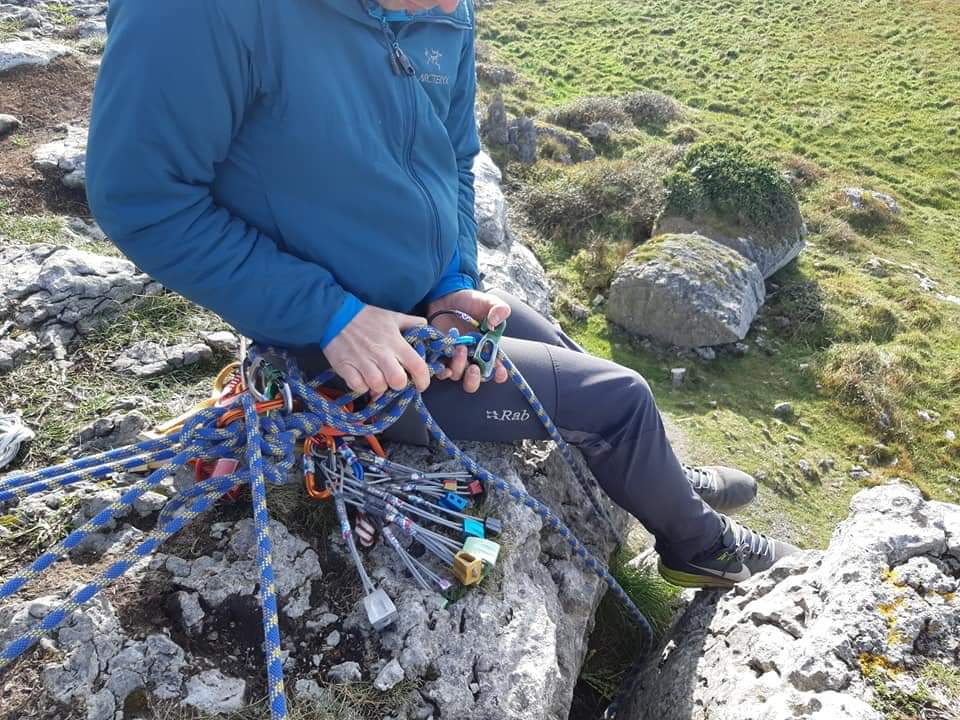
Considering the importance of the rope in climbing, it’s surprising how little most climbers understand their construction and ratings.
Below is a brief explanation of what the markings on the packaging of a new rope mean.
It would be easy to write at length on each of these markings and at times it’s been harder to make a concise but sufficient explanation.
What do all the markings mean?
This particular rope will serve me well for climbing single pitch routes in the Burren during the summer but of less use to me at Dalkey, Glendalough or Scottish Winter. Let’s see why:
The 1 indicates that this is a single rated rope.
Single rope: designed to be used on its own.
Half/double ropes: designed to be used as a pair, with only one rope clipped into each piece of protection.
Twin ropes: designed to be used as a pair, clipping both ropes into the same piece of protection.
Triple rated ropes are designed to be used as single, twin or half ropes. As such are the ultimate multipurpose tool and are priced accordingly.
This does not mean that after experiencing 7-8 standard lead falls, your rope is no good and should be retired. A common misconception.
Modern ropes don’t generally break, they cut or abrade.
The kinds of forces used in testing are extremely severe and not generally the kind of forces the average lead fall can create.
All UIAA certified ropes undergo a similar test process. To pass, it must survive a minimum of 5 simulated falls without breaking. This rope has failed after 7-8 of those test falls.
Delving into those fall factor forces is separate a blog post in itself, so while it’s safe to say that this rope is perfectly strong enough to withstand a lot more than just 7-8 “normal” lead fall scenarios.
Maybe if I have had a couple of big whippers in a row then I’ll take a break from using this rope and allow it to shrink back to normal size.
If I was to have the kind of fall simulated in the test, I’d probably not be going for a second attempt at the climb.
A higher fall rating can however indicate a better quality of rope, with increased durability and lifespan.
Impact Force, 8.4kn.
This is the force transmitted from the rope to the climber under a fall, essentially, the ropes ability to absorb the energy of fall.
The lower the number the more pleasant the fall.
Again, it is tested using high fall factors and doesn’t allow for the forces being absorbed by the climbers and belayers bodies, rope slippage through the belay device etc, which would occur in a real-life fall and would also contribute to a comfortable “soft catch“.
This rating can be a consideration for the trad climber as the lower the IF number, the better the dissipation of the forces created during a fall and the less force transmitted into the placed protection.
A sports climber taking multiple lobs on a project might appreciate the comfort of a rope with a low IF number.
In the case of bottom/top-roping, you ideally want a higher IF number as the forces created during this type of fall are low and we probably want less stretch, to avoid the climber hitting their ankles off a ledge or the ground.
Elongation in Use, 6.5%
This is the amount of rope stretch created when hanging a static weight from the rope. In testing, they use a static weight of 80kg.
So if an 80kg person was to hang on the full length of this rope, it would stretch to become a 42.6-metre rope or 6.5% of the length of the rope.
The thinner the rope, the more likely it is to stretch further. A rope will stretch more when wet but it will lose its elasticity the more it is used.
proportion of Sheath, 40%
This is how much of the construction of the rope is made up of sheath and how much of it is made up of the inner core (60%).
The core is where the primary strength and elasticity of the rope is, but the sheath determines its ability to withstand abrasion and its durability.
Remember, ropes generally don’t break, they cut, so this is an important rating to take into consideration.
This is why I have one set of ropes of working with (these run over more edges and take more abuse) and a different set for personal climbing (these have less wear and tear but bigger falls).
UIAA water absorption, 46%
Wet ropes stretch more, get heavier/harder to use and can make using ascenders and Gris-Gris difficult, so it can be important that they are water repellent, especially in snow and ice conditions.
This particular rope has a high absorbency and wouldn’t be much good for ice climbing, but will be just fine for use at a short single pitch crag on dry summer days.
As per the UIAA test, a true water repellent rope should have a water absorption rating of 5% or less. Some “Dry” ropes don’t achieve this as they are only dry treated. Like your waterproof jacket, the treatment wears off over time.
Elongation at 1st fall, 31%
This is the percentage of stretch in the rope the first time a dynamic fall or load is applied to it. Like the elongation in use test above, an 80kg weight is used and replicates a severe fall scenario.
While a maximum 31% stretch may seem like a very high and worrying number, it will always be less in reality, where we won’t achieve the forces created in the UIAA test.
However, it might just make you think about not using your brand new ropes on a short lead climb where the crux is at the bottom of the route.
The elongation percentage will reduce over the life of a dynamic rope.
Sheath Slippage, 0%
The less slippage between the core and the sheath of the rope, the more durable it is.
We’ve all seen the ends of a rope in a climbing wall get bunched up and fat from this, or feel a thin spot on a rope where it’s been damaged, so you would think 0% is an ideal score here.
However, ropes with less slippage can be less pliable and soft to handle. Some sheath slippage can even be a good thing if the rope is running over a sharp edge as the load is spread across a greater area.
Any visible damage or alteration to the rope from sheath slippage should be treated with caution and cut from the rope or retire the rope completely.
Other markings
While length, diameter and weight per meter of the rope are self-explanatory markings, they are helpful to let us know what category and preferred use to put a rope into.
So what rope should you buy then?
There’s no point spending a fortune on ropes if your style of climbing doesn’t need all the design features possible for a rope.
A low price doesn’t mean low quality, it could just mean fewer options to use it.
If you climb exclusively indoors you shouldn’t be concerned about ratings like weight or water repellency and should go for a thick robust and competitively priced rope. The Beal Wall master perhaps.
If the majority of your climbing is on smaller single pitch trad routes, then any single rated 50m rope will get you through most days in Ireland and will be super affordable. Something like the Tendon Smart 10mm.
For sport, any single rated rope will do once its sufficiently long enough to let you climb AND lower off the route. If it’s a particularly long route then definitely thinner lighter ropes are better.
But if you intend to or do a lot of multi-pitching in Ireland then get a set of 60m half/double ropes as well as the above 50m rope and mix and match between the two sets. I use DMM Crux 9.1mm ropes and they are class.
If you intend to go to Scotland in the winter, bring doubles and make sure your ropes are proper dry ropes or at least dry treated.
However, if money isn’t an issue and you want simplicity and a great all-round option, get a set of triple rated 60m Beal Joker unicoreGolden dry ropes to have the solution to all the above climbing scenarios.
Well all scenarios apart from a 30m+ sports climb that is.
I hope the above post is useful. Please feel free to contact me if you would like to discuss any aspect of this post.
The best solution for problem-solving is to avoid creating the problem in the first place. It seems so simple, but it works.
Ask any experienced RCI how often they actually have a major problem to solve or rescue to enact and I’m sure the answer will be hardly ever.
Having a good eye for potential problems and having a good working knowledge of the crags and cliffs we use with clients is the best possible way for us to avoid major problems.
Problem avoidance in the wild
Avoid routes with large ledges on them, such as Frost In May at Ballyryan. If a climber gets cragfast and cant be talked down, you ideally want them to eventually lose grip and safely fall off the climb onto the safety of the rope. If the climb you have set up has a large ledge, then they could easily stand or sit for quite a long time without falling off.
Avoid traversing routes as much as possible. This doesn’t mean that you have to stick to routes that are completely vertical. A lot of appropriate single pitch introductory climbs will have a small element of traversing in them and this is fine once managed or where they present a low consequence outcome for the climber should they fall. However, routes that traverse consistently are best avoided due to the obvious potential for big swings.
Overhanging routes can cause problems with overweight or top-heavy clients inverting. If the overhand is very steep, the client could take a big swing during a fall. While it’s unlikely you would set up overhanging routes for a novice, the RCI doesn’t always just work with novices and many climbers coming from an indoors background are more than comfortable and able for an overhang. Setting up a bottom rope on Stigmata might be frowned upon though.
Loose or suspect rock. Any routes with obvious loose rock or suspected dangerous loose rock should be avoided. I have a personal dislike for bottom ropes on Porcupine at Dalkey Quarry, as there is a massive and “booming” loose rock near the top, dislodging which would certainly create a severe accident for climber and belayer.
Attentive belaying is as important as just taking in. It’s common to see an instructor belaying a climber while also chatting to the rest of the clients on the ground. While taking in the slack rope is the primary concern of the belayer, they should also be observant of where the climber is going. They could easily move off route while the belayer is distracted, creating potential for an uncontrolled swing or climber getting cragfast.
Jewellery, scarves, hair, watches and phones can all get stuck, wrap-around or fall out of pockets while climbing. Always remember to start every session by asking clients to remove jewellery, put away coins and phones, or anything that can fall out of a pocket and hit someone. Choke hazards like scarves and catch hazards like long hair should be removed and tied up respectively. Insist on this, perhaps even provide a small box or bag where they can leave their valuables and don’t accept a client who thinks “it’ll be grand”. Describe finger “de-gloving” in detail if they aren’t respecting your request.
Helmets should be properly sized and fitted. If a climber does bang their head, you want the correct parts to be protected.
Harnesses should be fitted properly, around the fleshy part of the belly and above the hip bones. Not on the hip bones. They should be regularly checked especially if the climber took them off for the bathroom or a cigarette break.
Use triple-lock carabiners for clipping in. If you’re clipping customers in rather than tying in, be it for efficiency on a bottom rope set up or for the safety line on a group abseil, use a triple action locking carabiner and always always double-check it’s properly locked. I have observed people in the past who described themselves as experienced climbers, not fasten up a screw-gate carabiner they were about to rely on.
Clear and concise briefing prior to climbing is much simpler than solving a problem. Perhaps having the first climber or another instructor demonstrate what you would like them to do when being lowered, would prevent a nervous client not wanting to relax back onto a bottom rope. Likewise, it needs to be explained to novice clients that they aren’t attempting to top out on a bottom rope before they start climbing. It can be hard to direct or instruct someone who is far away at the top of a climb, feeling nervous and with strong wind deafening your instructions.
There are pros and cons in every aspect and system of climbing and abseiling. Ultimately, it is up to you to understand what these are and decide for yourself which you would like to use.
In the case of a trainee RCI instructor, we should understand all the systems and use the best systems where possible. Don’t just use one method because you were told it was the best, decide for yourself and be prepared to confidently back up your decisions with solid reasoning.
Good Practice for Abseiling
When abseiling, its good practice to extend your belay plate away from your harness using a sling.
Mainly this is to prevent your back up prusik being too close to your belay/abseil device and getting trapped or worse, held open.
Which Sling to use for Abseiling?
First and foremost, whatever sling material we use, we need to operate with extreme levels of care to ensure we don’t subject the extension to a shock loading.
I have used all 3 for extending. All types of work and all are safe when loaded statically, once you don’t subject them to a shock loading.
However, of the three options, Dyneema is most likely to break when shock loaded as it has no capacity to stretch, then Nylon, then Aramid.
With that in mind I normally use Aramid as my first choice for extending, but if you don’t have an Aramid sling, opt for Nylon, just remember the golden rule. Never shock load your slings.
Where should I connect the sling?
Just like when we tie in with the rope, put the sling around the tie in loops and not just the harness loop.
How should I connect it?
There are three common methods.
Method A is the quickest and strongest as it doesn’t tie a knot in the sling, but there is a greater risk of not clipping both ends of the sling, which would be catastrophic.
Method B gives you the option of different clip in spots due to the isolation knot(s). A further carabiner could be added to the end, which would be useful for safety on multi-pitch abseils. The girth hitch weakens a sling by up to 50%.
Method C is stronger than B and has the added bonus of allowing you to clip into any one of 4 loops and still be safe to use. Its a bit cumbersome, however.
Knots weaken slings
While knots are known to dramatically lessen the strength of a sling, let’s be realistic, as long as you never shock load the sling you won’t create a force big enough to snap it.
We exercise great caution every day when near cliff edges or when belaying climbers. So long as we treat our extended sling with the same caution and care then all of the above methods are safe.
Should I use a Prusik for back up?
With the above systems, Yes, absolutely. If I was using a gri-gri, no.
Prusik on a leg loop?
Most climbers, including myself, sometimes abseil with their device attached directly to their harness loop and the prusik loop attached to one of the legs of their harness.
The main pro is it’s quick and you don’t have to consider shock loading a sling, but the main cons are that harness leg loops aren’t designed to be loaded in this way and the prusik can get too close to the device this way.
I would expect an RCI trainee to understand, demonstrate and explain the pros and cons of all the above methods.
Purpose designed lanyards?
I have purposely not mentioned lanyards such as the Petzl Connect. While they are dynamic and designed to absorb a shock loading, I have the following personal opinions or observations on them:
In the realms of trad climbing, I find them annoying and they can get in the way while reaching for gear on lead.
They have a singular purpose, whereas a sling has a few purposes which allow me to carry fewer items on my harness.
I think climbers should be able to use and be comfortable with using a sling to extend a belay plate.
If my work routinely called for a cows tails, such as regularly operating a group abseil set up, I would use a purpose-designed lanyard.
I think purpose-designed lanyards are an excellent choice for sports climbing.
If you decide to use a purpose-designed lanyard, you should still be familiar with making your own from a sling, in case you lose or forget it.
Remember to always dress and stress your knots, put a knot at the end of your abseil rope and tie a stopper knot on anchor tie ins.
Please feel free to contact me if you would like to discuss any aspect of this video or other skills.
There are two main setups we can use to rig a personal abseil. Both work, both are safe and it’s sometimes the crag we are at that determines which system we use.
Remember this is an abseil intended for instructor use only, at RCI level, these types of abseil are not for use by a client.
Setting up a Personal Abseil
Set Up A
Set Up B
Below are basic step by step instructions that RCI trainees might find useful. This blog is designed to jog your memory rather than teach this set up from scratch, so if you are not experienced in the skills required to build this setup, please don’t attempt it without additional guidance.
Anchors for Personal Abseil
How many anchors should you put in any setup? As many as it takes for the set up to be safe.
That said, in general, a good system can be set up with 2 or 3 gear placed anchors. Just make sure they are 100% bomber.
Set up A
In this setup, we bring our rope strands together to form an equalised master point away from the cliff edge, much like our top rope system. We then measure out exactly how much rope we need to abseil to the bottom of the cliff and connect this rope to the master point with a locking carabiner.
The benefits of this system are that we don’t have a lot of rope lying around the bottom of the crag, getting walked on or dirtied. Its also less bouncy (the more strands in a setup, the less movement).
The downside is that it uses more rope in the system, especially if the anchors are far away from the cliff edge. It also uses more gear than set up B and is a little slower to set up.
If I was working at a short crag like Ballyryan or the lower end of Ailladie, and I had a 50m abseil rope with me, then I would use this system.
Always remember to put a knot at the end of the abseil line, it’s a good habit to get into, especially if you can’t fully see the end of rope touch the ground. For example, near the Ghost slab in Dalkey is a common area for instructors to set up abseils and the last metre or so is out of sight from the top.
Set Up B
By tying an overhand knot on a large bight of rope, we can connect the anchors quickly and simply, to set up a personal abseil.
This also uses up less gear. In fact, if you have good quality threads at the top of the crag, like in Ballyryan, this set up can be made entirely from the rope, using no slings, nuts or carabiners. If you haven’t practised this already, it’s worth doing so for development, just don’t try it for the first time on your assessment!
The main disadvantage is that we throw all our static cable over the edge. This could lead to our slack rope on the bottom of the crag getting damaged, dirtied or in the way of other crag users.
We could prevent this by building our system “backwards”, finishing our system somewhere in the middle of the rope, but this would possibly be more time consuming and frustrating as it would be trickier to adjust when finished.
I would be more inclined to use set up B at a crag like The Prow at Fairhead, where I’ll need every inch of my abseil rope to get to the bottom of the crag.
Cows-tail or lanyard?
How we connect ourselves to the abseil rope is worth a separate blog entry in itself, and luckily for you, I’ve already written it.
Remember to always dress and stress your knots, put a knot at the end of your abseil rope and tie a stopper knot on anchor tie ins.
Please feel free to contact me if you would like to discuss any aspect of this video or other skills.
As an RCI, a Bottom Rope is probably what you will spend most of your time setting up.
The set up should be tidy, easily adjustable simple to understand and 100% bombproof.
Setting up your Bottom Rope
Below are the basic step by step instructions that RCI trainees might find useful. This blog is designed to jog your memory rather than teach this set up from scratch, so if you are not experienced in the skills required to build this setup, please don’t attempt it without additional guidance.
Anchors
How many anchors should you put in a bottom rope set up? As many as it takes for the set up to be safe.
That said, in general, a good system can be set up with 2 or 3 gear placed anchors. Just make sure they are 100% bomber.
If you are putting in a lot more anchors than that you either don’t trust your placements or are climbing at an area of questionable rock quality. Oughtdara or Murroughkilly for example.
Rope Selection for a Bottom Rope
You should use a static rope for the anchor and a dynamic rope for the climbing rope.
Rope Strands
However many anchors you use for a bottom rope, in my opinion, you should do everything to make sure you only have one bight of rope draped over the cliff edge.
Having two bights of rope uses a lot more rope and is much tougher and time-consuming to equalise. It also just looks wrong.
How much of a bight to leave over the edge will take some practice, you don’t want too much of your system over the edge as it shortens the climb, whereas too little compromises the system’s safety.
Isolation Knots
You should aim to include an isolation knot (Fig 8 on the bight) in your set up. It makes equalising easier, helps keep the rope protector in place and can be a handy clip in spot for personal safety if needed.
Rope Protector
Use a rope protector. Its best practice and there is no reason not to.
Carabiners
Use two symmetrical pear-shaped crabs of the same size and design. Go back to back or gates on the same side, it really doesn’t matter as both are safe. Just make sure they are locked and orientated correctly.
Before Using your Bottom Rope
Once you have built your system and are happy with it, be sure to take all the stretch out of the system from the bottom of the route by pulling/weighting the dynamic rope as much as possible.
This will make for a more comfortable and safer lower off for the first climber to use it and could highlight any potential major mistakes before a client ties on.
Remember to always dress and stress your knots and tie a stopper knot.
Please feel free to contact me if you would like to discuss any aspect of this video or other skills.
The group abseil is one of the more complex setups shown on the RCI training. Sometimes this leads to confusion with some elements of the setup.
Below are the basic step by step instructions that RCI trainees might find useful. This blog is designed to jog your memory rather than teach this set up from scratch, so if you are not experienced in the skills required to build this setup, do not attempt it without additional guidance.
Group Abseil Anchors
Every crag top is unique, but working on the assumption that you are placing gear for your anchors, you will need a minimum of 3 anchor points for a group abseil.
There will always be exceptions, but for the purposes of this let’s work off 3 placed anchors.
Three Loops
Working off three anchors, it’s quite easy to have 3 loops coming out of your large fig 8 knot (BFK). The common mistake I see made here is that the last strand of rope isn’t included in the BFK when its tied, which can be extremely dangerous as it just pulls through the BFK when weighted.
See the pictures below. If the last strand of rope isn’t coming out of the back of the BFK then it’s not tied properly.
Cows Tail, Saftey rope, Abseil Rope
If we’re aiming to deliberately create 3 loops, logic would suggest we must have a use for each loop.
For your safety, connect your harness to an outside loop by a cows tail and crab or purpose-designed lanyard.
connect the dynamic safety rope to the middle loop using a tied off Italian hitch.
connect a separate static abseil line to the last loop via a tied off Italian Hitch, so that it can be completely releasable from the anchor.
Positioning & Final Set up
Take the time to think ahead when setting up. The final picture should be clean, organised and easy to understand what each part is doing in the setup.
We shouldn’t have any trip hazards for our clients to navigate around and be set up in a way that they can easily approach.
The set up should be an appropriate distance from the edge of the cliff, to allow clients clip in, while still being safe and to allow them time to get used to the process of moving backwards.
If we use different coloured carabiners and figure of 8s we can refer to them by colour rather than by use, which makes it easier to instruct our clients when they reach the bottom.
Practice your group abseil
The pictures and instructions above give a good basic example of a safe and tidy set up. While there are many tweaks and adjustments that can be made to improve its use, I have kept the set up as simple as possible.
Once you are comfortable with the basics and have practised working a group abseil for real, then these tweaks should be obvious to you or indeed feel free to get in touch and we can discuss variations to the setup.
Remember to always dress and stress your knots and leave a long tail and/or tie a stopper knot.
Please feel free to contact me if you would like to discuss any aspect of this video or other skills.